Easy, Family-Favorite Baked Tenders: Better Than Store-Bought
There's a universal truth about chicken tenders: they're a timeless comfort food, beloved by children and adults alike. But too often, we reach for the frozen, pre-packaged variety, or resort to deep-frying for that coveted crispy exterior. What if we told you there's a way to achieve a shatteringly crisp, golden-brown coating and incredibly juicy interior, all without the heavy oil or mystery ingredients? Enter the world of homemade baked chicken tenders – a culinary game-changer that promises superior flavor, a healthier profile, and that satisfying crunch, all from the comfort of your oven.
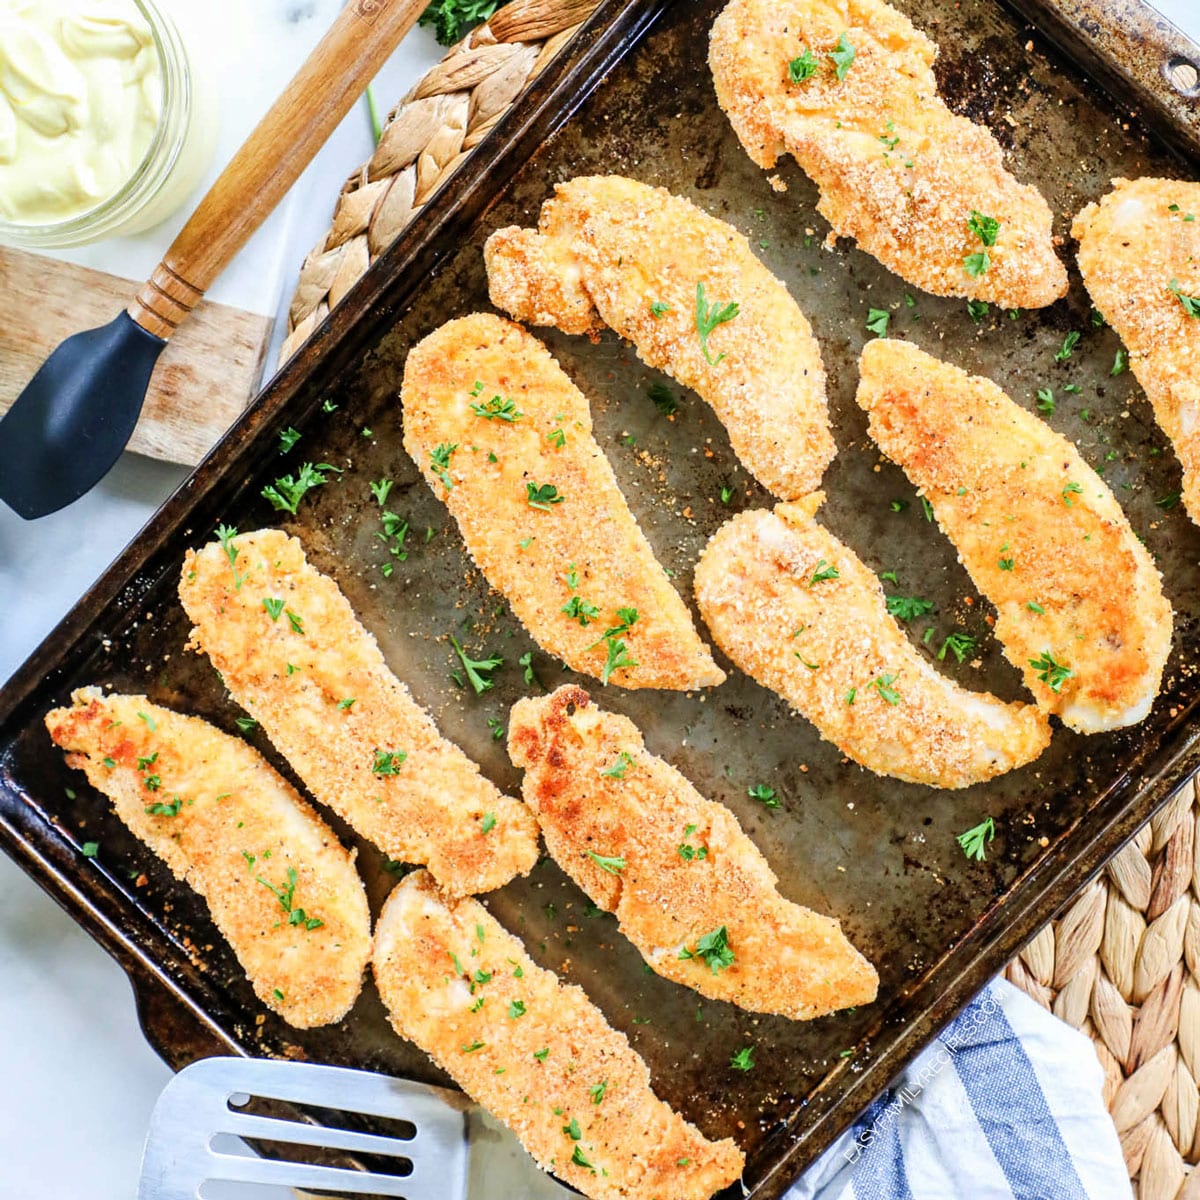
Forget everything you thought you knew about "fried" chicken. These aren't just a healthier alternative; they're a taste sensation that genuinely outshines their store-bought counterparts. Imagine the aroma of toasted breadcrumbs and savory spices filling your kitchen as these golden strips bake to perfection, ready to be devoured with your favorite dipping sauce. This recipe isn't just about cooking; it's about creating a moment, a memory, and a meal that will have everyone asking for more.
Why Choose Homemade Baked Chicken Tenders?
The allure of a perfectly breaded chicken tender is undeniable. That initial crunch, followed by tender, flavorful chicken, is pure culinary bliss. While deep-fried versions deliver on crispiness, they often come with excessive oil and a heavy feeling. Store-bought options, while convenient, frequently contain fillers, preservatives, and a flavor profile that pales in comparison to fresh ingredients. Choosing homemade baked chicken tenders offers a multitude of benefits that make them the ultimate family meal:
- Healthier "Fried" Flavor: You get all the textural joy of fried chicken – that iconic crispy coating – with significantly less fat. Baking uses a fraction of the oil, making it a lighter option without compromising on satisfaction.
- Unbeatable Taste & Texture: Homemade means fresh ingredients, carefully chosen seasonings, and a process designed for optimal flavor and texture. The result is an exterior that's truly crisp, giving way to incredibly moist, tender chicken inside. There's no comparison to the often rubbery texture or bland taste of pre-made varieties.
- Family Favorite, Guaranteed: From picky toddlers to discerning adults, chicken tenders are a universal crowd-pleaser. This recipe is designed to be appealing to all ages, making dinner time less of a battle and more of a shared joy. They're versatile enough to be a standalone meal, part of a platter, or even an exciting addition to other dishes.
- Control Over Ingredients: When you make it yourself, you know exactly what's going into your food. No mysterious fillers, no excessive sodium, just simple, real ingredients you can trust. This is particularly important for families mindful of dietary needs or preferences.
- Quick Prep & Minimal Cleanup: While there are a few steps involved, the preparation process is straightforward and manageable. And thanks to a smart baking technique, cleanup is surprisingly minimal, especially if you line your baking sheets.
The comfort food experience of crispy baked chicken doesn't have to be a greasy indulgence. It can be a wholesome, incredibly delicious, and satisfying meal that you feel good about serving.
The Secret to Unbeatable Crispiness and Juiciness
Achieving the perfect baked chicken tenders involves a few key techniques that elevate them from good to truly exceptional. It's not just about coating chicken in breadcrumbs and baking; it's about building layers of flavor and texture that ensure every bite is a revelation. This isn't just a recipe; it's a methodology for perfection.
The Flavorful Batter: Beyond Just a Binder
Many recipes skip a crucial step: a pre-breading batter. But here, the batter is your secret weapon. It doesn't just help the breadcrumbs cling; it infuses the chicken with moisture and subtle flavor enhancers. Our unique batter components play specific roles:
- Whisked Egg: The primary binder, ensuring the breadcrumbs adhere beautifully.
- Sour Cream: This is a game-changer. It adds incredible moisture, tenderizing the chicken and introducing a slight tang that brightens the overall flavor profile. Its fat content also contributes to richness.
- All-Purpose Flour: Thickens the batter, creating a more robust layer for the breadcrumbs to grab onto, which in turn helps seal in the chicken's juices.
- Subtle Flavor Boosters (Dijon, Hot Sauce, Honey): Trust the process here! These ingredients are carefully balanced to enhance the chicken's natural flavor without being individually detectable. The Dijon adds a savory depth, the hot sauce (even just a dash) brings a touch of warmth and complexity, and the honey rounds it all out with a hint of sweetness. Together, they create a nuanced background flavor that makes these tenders truly addictive.
This marinade and batter combination keeps the chicken incredibly juicy, preventing it from drying out in the oven. For an even deeper dive into achieving that perfect crunch and internal moisture without a fryer, check out our guide on Get Crispy, Juicy Baked Chicken Tenders Without Frying.
Buttery Toasted Panko: The Ultimate Crispy Coating
For that ultimate shattering crispness, traditional breadcrumbs simply won't do. Panko breadcrumbs are a non-negotiable ingredient. Their larger, flakier texture provides superior crunch compared to finely ground breadcrumbs. But we take it a step further:
- Toasting with Melted Butter: This is the golden ticket. By tossing panko with melted butter and briefly toasting it in the oven before coating the chicken, you achieve two things: the butter infuses the panko with incredible flavor and helps it crisp up perfectly, and the pre-toasting ensures the breading is already golden and crunchy by the time the chicken finishes cooking, preventing soggy results.
- Parmesan Cheese: A touch of grated Parmesan mixed into the toasted panko adds a powerful punch of umami and savory flavor, elevating the breading beyond simple salt and pepper.
Preparation and Baking Techniques for Perfection
Beyond the batter and breading, how you prepare and bake the chicken makes a significant difference:
- Pounding the Chicken: Whether you start with chicken breasts or tenderloins, gently pounding them to an even thickness ensures uniform cooking. This means no dry ends or undercooked centers, and consistent tenderness throughout.
- Wire Rack Baking: This is crucial for all-around crispiness. Baking the breaded chicken on a wire rack set over a baking sheet allows air to circulate around all sides of the tenders, preventing the bottom from becoming soggy.
- Optimal Oven Temperature: A consistent 375°F (190°C) oven provides enough heat to cook the chicken through quickly while achieving that beautiful golden-brown crust.
Understanding the synergy between the batter, the breading, and the cooking method is key. Discover more about this in Mastering Baked Chicken Tenders: Batter, Panko & Juiciness.
Step-by-Step Guide to Perfect Baked Tenders
Creating these incredible homemade chicken tenders is a systematic process, easily mastered with a little organization. Get ready to impress your family and yourself!
1. Prepare the Chicken
If using chicken breasts, slice each breast lengthwise into 3-4 strips, roughly the size of a tenderloin. Place the chicken strips between two pieces of plastic wrap or in a large zip-top bag and gently pound them to an even 1/2-inch thickness using a meat mallet or a heavy rolling pin. This ensures even cooking and tenderness. Season both sides lightly with salt and freshly ground black pepper.
2. Whisk Up the Flavorful Batter
In a medium bowl, whisk together one large egg, 1/4 cup sour cream, 2 tablespoons all-purpose flour, 1 teaspoon Dijon mustard, 1/2 teaspoon honey, and a dash (about 1/4 teaspoon) of hot sauce (like Frank's RedHot). Ensure the mixture is smooth and well combined. Add the prepared chicken strips to the batter, tossing gently to ensure each piece is fully coated. Allow the chicken to marinate in the batter for at least 15 minutes at room temperature, or cover and refrigerate for up to 4 hours for deeper flavor penetration.
3. Toast the Buttery Panko
Preheat your oven to 375°F (190°C). In a separate medium bowl, combine 1.5 cups of Panko breadcrumbs with 3 tablespoons of melted unsalted butter and 1/4 cup grated Parmesan cheese. Toss well to coat the panko evenly. Spread the buttery panko mixture in a single layer over a large, light-colored baking sheet. Bake for 6 minutes, or until the panko is golden brown and fragrant. Remove from the oven and transfer the toasted panko back to the medium bowl – this makes coating easier.
4. Bread and Bake
Set up your breading station: marinated chicken in one bowl, toasted panko in another, and a large baking sheet fitted with a wire cooling rack next to it. Working one at a time, remove a chicken tender from the batter, allowing any excess to drip off. Transfer it to the bowl with the toasted panko, pressing firmly to ensure the breadcrumbs adhere completely on all sides. Gently transfer the coated tender to the wire rack on the baking sheet, ensuring there's space between each piece for air circulation.
Bake the chicken tenders at 375°F (190°C) for 18-20 minutes, or until the chicken is cooked through (internal temperature reaches 165°F/74°C) and the breading is a deep golden brown and wonderfully crisp. If you desire extra crispiness or color, you can briefly broil them for 1-2 minutes at the end, watching carefully to prevent burning.
5. Serve and Enjoy!
Remove the baked chicken tenders from the oven and let them rest for a few minutes before serving. This allows the juices to redistribute, ensuring maximum tenderness. Serve immediately with your favorite dipping sauces!
Serving Suggestions & Flavor Variations
The beauty of these baked chicken tenders lies in their versatility. They're fantastic on their own, but truly shine when paired with complementary sides and sauces.
Dipping Sauce Extravaganza
A great tender deserves a great dip! Some classic pairings include:
- Homemade Honey Mustard: A sweet and tangy classic that perfectly complements the savory chicken.
- Ranch Dressing: Creamy, herby, and universally loved.
- BBQ Sauce: Smoky, sweet, or spicy – choose your favorite!
- Ketchup: The ultimate kid-friendly choice.
- Marinara Sauce: For an Italian-inspired dip, especially if you added extra Parmesan to your panko.
Beyond the Platter: Creative Uses for Leftovers
If you manage to have any leftovers (a rare feat!), these tenders are incredibly versatile:
- Chicken Parmesan Subs: Slice them and layer with marinara and mozzarella on a toasted roll.
- Crispy Chicken Salads: Chop and add to a fresh green salad with your favorite dressing.
- Wraps & Sandwiches: Slice and tuck into a tortilla with lettuce, tomato, and a creamy sauce.
- Chicken & Waffles: For a decadent brunch, serve alongside fluffy waffles and a drizzle of maple syrup.
Spice It Up: Easy Flavor Variations
Feel free to customize the flavor profile of your oven-baked chicken with these simple additions:
- Smoked Paprika & Garlic Powder: Add 1 teaspoon smoked paprika and 1/2 teaspoon garlic powder to the panko mixture for a warm, savory depth.
- Spicy Kick: Increase the hot sauce in the batter, or add a pinch of cayenne pepper to the panko for a bolder heat.
- Herbaceous Touch: Mix in 1 teaspoon of dried Italian seasoning or fresh chopped parsley to the panko for an aromatic boost.
Conclusion
There you have it – the definitive guide to crafting easy, family-favorite baked tenders that are truly better than anything you can buy pre-made. By focusing on quality ingredients, a thoughtfully constructed batter, and clever baking techniques, you can achieve that irresistible crispy exterior and wonderfully juicy interior every single time. This recipe isn't just about making chicken; it's about reclaiming the joy of homemade comfort food, empowering you to create delicious, healthier meals for your loved ones. So, ditch the freezer aisle and the deep fryer, and embrace the magic of the oven. Your taste buds, and your family, will thank you for it!
